BLOG
Category: 'iron foundry'
Thor v2 is underway, with Thor.NET close behind
We’ve heard a great, positive response to the release of Thor, and we’ve started work on Thor v2 which will be compliant with Cloud Foundry v2 environments. We’re also getting going on Thor.NET so that Windows developers can also get in on the Cloud Foundry fun.
Read MoreManage Cloud Foundry from OSX with Thor
We're excited to announce that a stable release of the OSS Thor client is ready to go! Thor is a OSX client tool for managing ANY Cloud Foundry v1 environment. You can view (and contribute!) to the source code, or download a ready-to-use, compiled version.
Read MoreDeploy .NET Apps to Cloud Foundry v2 with Iron Foundry
The Pivotal team recently made a significant upgrade to Cloud Foundry, changing how applications are deployed, staged, isolated, and routed. In order to work with this new model, Iron Foundry had to undergo some re-engineering work. Today, we’re proud to announce an initial release of a Cloud Foundry v2-compliant build of Iron Foundry.
Read MoreMicro Iron Foundry Image Updated and Ready for Use
Micro Iron Foundry is a VM image that makes it easy to add the .NET DEA to Micro Cloud Foundry development environments. This powerful combination helps developers design their Cloud Foundry solutions locally before pushing to any number of public hosting providers.
Read MoreNew Support for Developers Using Visual Studio 2012
Iron Foundry developers are likely to use a whole host of different IDEs to build and deploy applications. For those building .NET applications, Visual Studio is likely the development environment of choice. Iron Foundry developers can now push and manage apps directly from Visual Studio 2012 using the upgraded Visual Studio Extension.
Read MoreBuilding Iron Foundry Apps that Leverage Windows Azure ACS for User Authentication
Iron Foundry and other PaaS frameworks are built to deliver a set of services to developers for building applications. While we think Iron Foundry has a great set of web, data and messaging services available, it by no means includes everything that a developer can use to craft a cool web app. Ideally, a developer can mix and match services from multiple PaaS providers in order to get everything that’s needed to solve a particular problem. For instance, what if an Iron Foundry developer wants to build a .NET application that lets users log in with credentials from a trusted provider? In this blog post, I’ll show you how to do user authentication/authorization in an Iron Foundry ASP.NET app by using the Windows Azure Access Control Service (ACS).
What is Windows Azure ACS?
Windows Azure ACS is essential a claims transformation engine that connects to trusted web identity providers (e.g. Facebook, Google, Windows Live, Yahoo) and custom identity providers (e.g. through Active Directory Federation Services), and authenticates the user before passing along a set of claims to your web application. It provides developers a way to outsource the identity management part of their application. ACS itself doesn’t store credentials or act as an identity provider, but rather, it acts as a middleman that can take a series of input claims (e.g. “Google username”, “Windows logon ID”) and transform them into a single claim (“user ID”) used by your app. It’s a cool way to get your application out of the business of handling unique identity providers or storing credentials.
Let’s walk through the steps to building a simple, secure web app that we can deploy to Iron Foundry.
Step 1 - Create new ASP.NET MVC 4 (internet) application
To get started, I built a new ASP.NET MVC application in Visual Studio 2012.

Once the project was created from the MVC4 template, I simply built it and ran it. You can see the default website and notice that I can register for an account. At this point, what this does is store my credentials in the default membership provider (which is a local database). I don’t want that as my long term solution. I want to let users log in with their web identity provider of choice.

2. Configure Access Control Service to Recognize Our Iron Foundry Application
Virtually every Windows Azure service has migrated from the clunky Silverlight portal to the new, clean HTML portal. Unfortunately, Windows Azure ACS still lives in the old portal. Once I regretfully logged into it, I saw the options to add/configure identity providers, set up the relying party applications (like the one I created), and define the claims transformation rules.

If I wanted to add ADFS as a valid identity provider, I could do that here. Instead, since I used existing web identity providers, I could jump right to the “relying party applications” section. On the first part of this form, I set the friendly name of the application, and the URL that will receive the claims. Initially (until I deployed to Iron Foundry) this was a local address on my machine.

Further down this form, I was asked which (configured) identity providers I wished to use, whether or not to create a new set of claims transformation rules, and what certificate to use for signing the tokens.

After saving my relying party entry, I jumped to the “Rule Groups” section of this portal to configure the transformation rules. I chose the option to “generate rules” for all the available identity providers, and was left with a series of “passthrough” rules that take whatever claim value was issued by the identity provider and ships it, as is, to my application.

An individual one of these rules, such as the “Google name” one, has an input claim type and value, and an output claim type and value. While the one below has the same type and passthrough value, you can imagine how you might have three different providers with different input claim types/values all map to a single, internally-defined claim type and/or value.

3. Configure ASP.NET App to use ACS for Identity Management
With my ACS configuration complete (for now), I returned to Visual Studio 2012 to make it “ACS aware.” Now there is a great new tool for Visual Studio 2012 and the latest Windows Identification Foundation bits (which you can see by grabbing the Identity and Access Tools), but since Iron Foundry doesn’t yet support .NET 4.5, I wasn’t able to use the wizard tooling. The latest WIF only applies to .NET 4.5, so I jumped back to using WIF 3.5. To easily grab this version, simply add the NuGet package for Windows Identification Foundation to a project.

With all the proper assemblies in place, I then manually updated my web.config file to reflect my use of WIF and ACS. You can find my complete web.config file below. To learn more about the significance of each section, I’d recommend the blog post Windows Identity Foundation (WIF) Configuration Sections in ASP.NET Web.Config.
That’s about it. Clearly if I wanted to customize the handling of these claims (e.g. show the value of a claim besides “name” on the home page), there’s additional work I’d want to do in my code. When I ran this application, I was quickly prompted for credentials and the ACS site served up a page for me to select which identity provider to use.

When I chose the Google provider, I was redirected to the Google accounts page and asked to log in.

Once I logged into my account, I was returned to my custom web app which recognized that I was now authenticated!

To prove that this is an account that wasn’t managed by my application itself, I clicked on my name to “manage” my user. I was presented a message indicating that there’s no local password for this user, as the identity provider was NOT my local membership provider.

4. Update and Deploy the App to Iron Foundry Environment
The final task was to update the ASP.NET application and ACS configurations before deploying the application to Iron Foundry. First, I returned to the Windows Azure ACS portal to change the “realm” of the relying party entry that I created for my custom application. I planned on deploying this application to the free IronFoundry.me environment, so I entered the expected destination of the application.

After saving this change, I returned to my Visual Studio project and entered that same IronFoundry.me URL into the web.config file where the “localhost” value had been before. After publishing the website to the file system and executing a Cloud Foundry vmc push command from my Command console, my app was quickly deployed.

Did it work? I browsed my newly published app on Iron Foundry, and just as with the local site, I was prompted for which identity provider to use. After selecting Google and plugging in my credentials, I saw my logged in user on the website.

Cool! This is a fun case of being able to use the public/private Iron Foundry PaaS but still take advantage of other useful services offered by other PaaS solutions.
Read MoreWindows 8 & RT Discussions, Thor, Thor .NET and vcap-client Status Updates
A few updates from the teams:
Thor
Thor is moving along with implementation of services starting yesterday (Monday). You can view our live Huboard Kanban to see what is currently being worked on. The interface in the last few weeks has gotten a faster, cleaner appearance and stabilized even more around deploying and maintaining your Cloud Foundry based environments.
Read MoreIronFoundry.ME Environment Now Running Latest Iron Foundry Bits
Last weekend, we did a refresh of the sandbox IronFoundry.ME environment to make sure that it was running the latest Iron Foundry bits. As part of that update, we've enabled and upgraded a few interesting things.
Read MoreIron Foundry vcap-client (AKA The .NET Cloud Foundry vcap-client)
 Ever want to write code against the Cloud Foundry API but you don't want to go to the trouble of wrapping up the API calls with library? Well, have no fear there's no need to! With dilligent work from the Iron Foundry team, a few suggestions from outside, and a few contributions from the community we've pulled this together for you. Here's a step by step of what we've accomplished in the last week to bring a solid, clean and tested library to you.
Managing PostgreSQL and MySQL Application Instances in Iron Foundry
One reasonable concern with PaaS platforms is whether or not developers can easily access and administer backend application services. Iron Foundry database services such as PostgreSQL and MySQL have very strong management tools that you don't want to abandon when working with a PaaS instance. In this post, we'll look at how to wire up existing database management tools to PostgreSQL and MySQL.
PostgreSQL
PostgreSQL (discussed in this previous Iron Foundry blog post), is a very popular open source database. Developers or database administrators typically use the pgAdmin tool to author and debug queries, perform database backups/restorations, reindex and cleanup (VACUUM) data, manage server jobs, and much more. You can download the pgAdmin tool directly, or find it included in the PostgreSQL package itself. For this demonstration, I installed PostgreSQL locally and got the pgAdmin tool along with it. After installing the database software, I opened a command prompt on my Windows machine and targeted my Iron Foundry environment.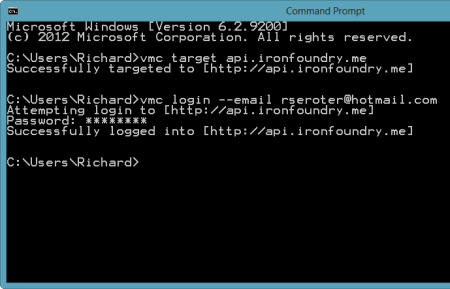 After authenticating myself, I issued a vmc command ("vmc services") to see which application services were available, and which services I had already provisioned.
 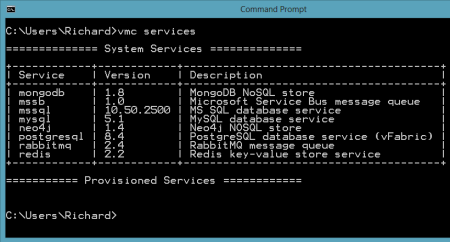 So far, no application services were provisioned. Let's change that. I created a new PostgreSQL instance by issuing the vmc command vmc create-service postgresql. Note that I didn't need to bind it to an application and can simply create a standalone instance that could be used by many Iron Foundry web applications.
 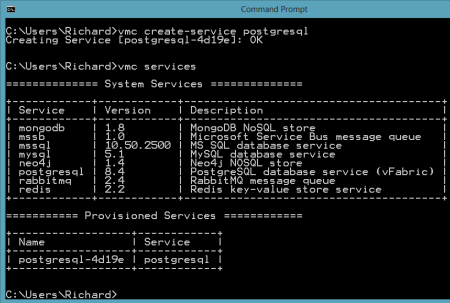 Now there was a running instance of PostgreSQL in my environment. At this stage, there was no way for the pgAdmin tool to access this instance. However, thanks to the Cloud Foundry Caldecott technology, I could create a secure tunnel for pgAdmin. The vmc tunnel
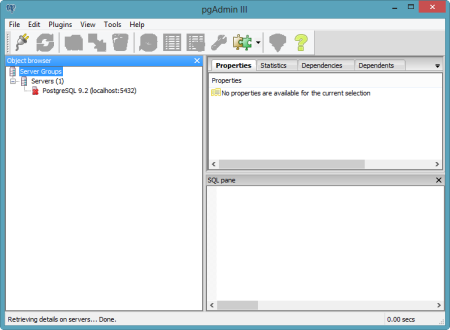
 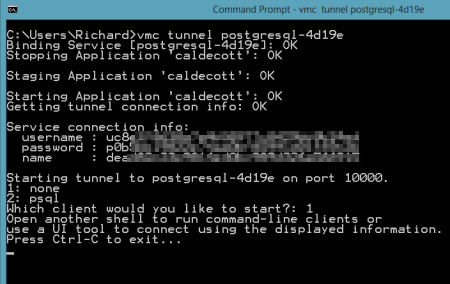 I could have chosen to use the psql client which would have let me issue commands right here in the command prompt, but since I wanted to use the full-featured pgAdmin tool, I selected the "none" client. Notice that I got four key pieces of information back: username, password, name and port. Together, these data points will get us logged into our environment. I opened the pgAdmin tool and could see that the only server currently recognized was the one on my local machine.
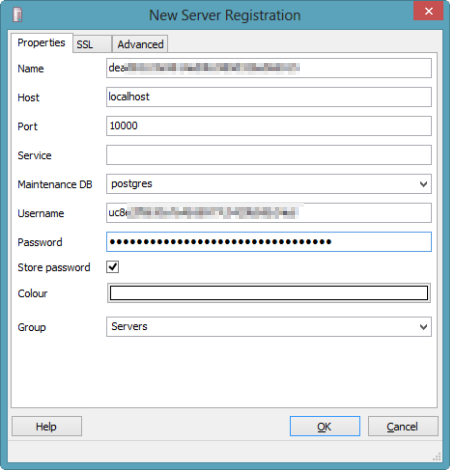
  I clicked the "Add a connection to a server" and was shown the "New Server Registration" prompt. For the "Name" value, I used the "name" that came back from the tunnel command; for "Host" value I set it to "localhost"; for the "Port" I used "10000"; and for the Username and Password, I used the corresponding values returned by the tunnel command.
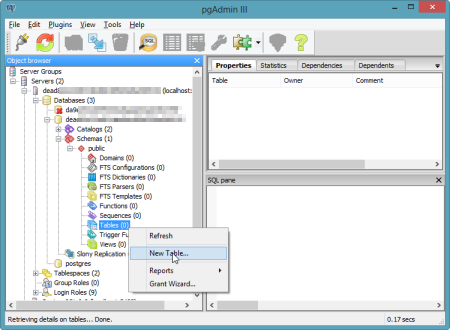
  Once connected, I could navigate all the database artifacts and browse the standard options for backing up data, querying tables, and creating new tables.
  The pgAdmin tool is a very handy and useful way to manage your database artifacts and Iron Foundry makes it easy to use this tool against your application services.
MySQL
MySQL is also a very popular open source database and we want to make sure that database developers and administrators can use familiar tooling even if their application instance sits in a PaaS like Iron Foundry. The MySQL team has made significant investments in their Workbench tool, and here we'll see exactly how you hook the Workbench up to an Iron Foundry instance. First, I downloaded the standalone Workbench tool. Then, I added a new MySQL instance to my Iron Foundry environment by using the vmc create-service mysql command.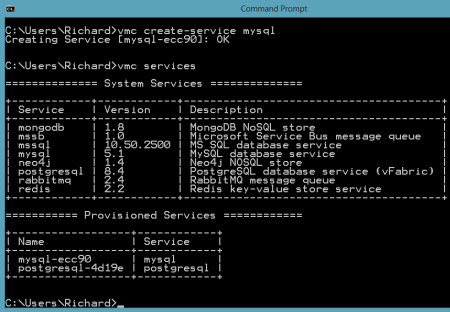 Like the PostgreSQL example prior, I created a tunnel so that the MySQL Workbench tool could "see" our Iron Foundry instance. As before, I also chose the "none" client so that I could connect the GUI tool instead of issuing command statements only.
 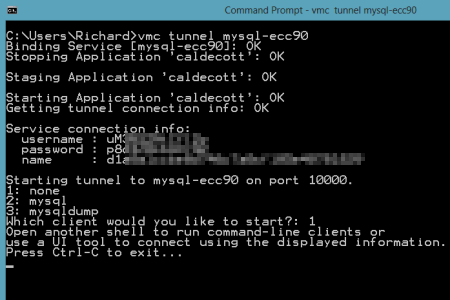 Notice that I got back database credentials ("username"/"password"), a schema instance name ("name"), and a port number. I was now ready to connect the MySQL Workbench to my database instance. The Workbench has three core functions: SQL development, data modeling, and server administration.
 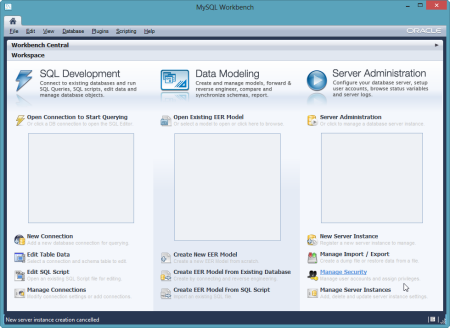 In this example, I created a new pair of tables, and deployed them to the database instance in Iron Foundry. In the Workbench, I clicked the "Create New EER Model" in order to generate a data model. The first thing that I did was right-click the schema name and choose "Edit Schema." On the subsequent window, I changed the default "mydb" name to the the "name" value returned by the vmc tunnel command.
 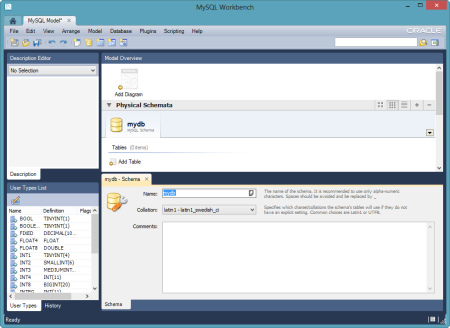 I then chose to add a new diagram to the model and proceeded to create a pair of new tables, "customer" and "order", and defined a relationship between them.
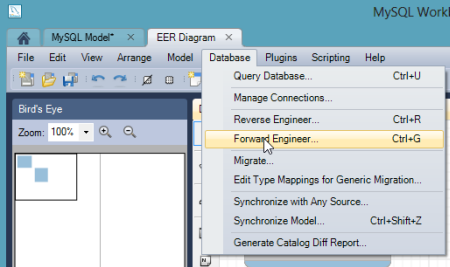
 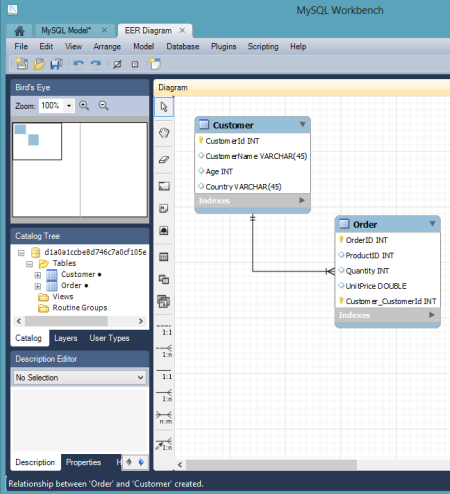 With the model complete, I chose the "Forward Engineer" option so that this model could be used to generate the actual tables.
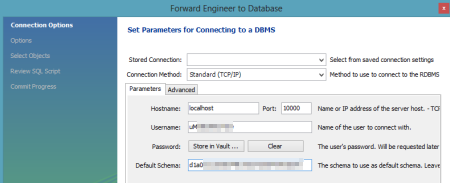
  I was then prompted to create an actual connection to the target database, and this is where the tunnel-provided values came into play. I plugged in the username and password, and set the Hostname value to "localhost" and the Default Schema to the tunnel-provided "name" value.
  I then kept the remaining default options, including the selection of the two tables to forward engineer, and reviewed the pending SQL Script to be executed. After successfully completing the wizard, I could open an instance of the SQL Editor and browse my schema.
 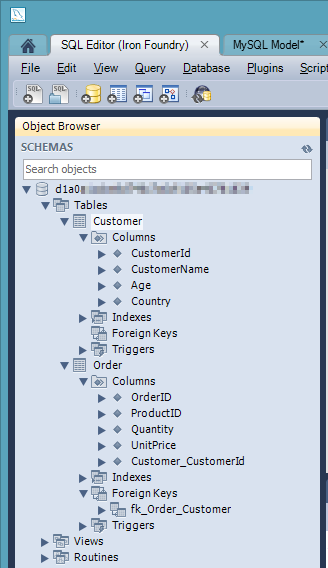 Sure enough my two tables, relationship included, were there.
